Ever since I’ve started as a UX/UI designer (on a professional level, at least), I’ve “struggled” with previewing my designs/mockups/prototypes on devices I was designing for. I remember exporting screens and opening them in the gallery app, manually zooming to fit them on the screen, and assuming it looked as it will on a real device. But then Figma announced its Mirror application and basically flipped the whole thing, and after, real-time prototyping in Figma became a thing.
Figma Mirror is a neat app (available for Android devices and that other phone) that lets you preview your work in real-time on a physical device. It looks like the future is now (old man) and Figma has created something that is a must-have for every designer or someone that likes to think that they’re one.
Setting up the “environment”
It’s straightforward to get started with the Mirror app. Just download it from the store of your choice (Google Play or App Store; there’s even a web app that allows you to do the same) log into your Figma account (the one you’re designing in) and that’s it, you’re good to go.
We’ll be using a design that was created as a part of our internal design practice in 25 minutes (when the article comes out we’ll insert the link to that blog post here), but you can use whatever you want to preview on your device.
So, after we’ve chosen our project and opened the app on the device, using our desktop app we pick the desired frame by clicking on it, and like magic, our frame is visible on the device.
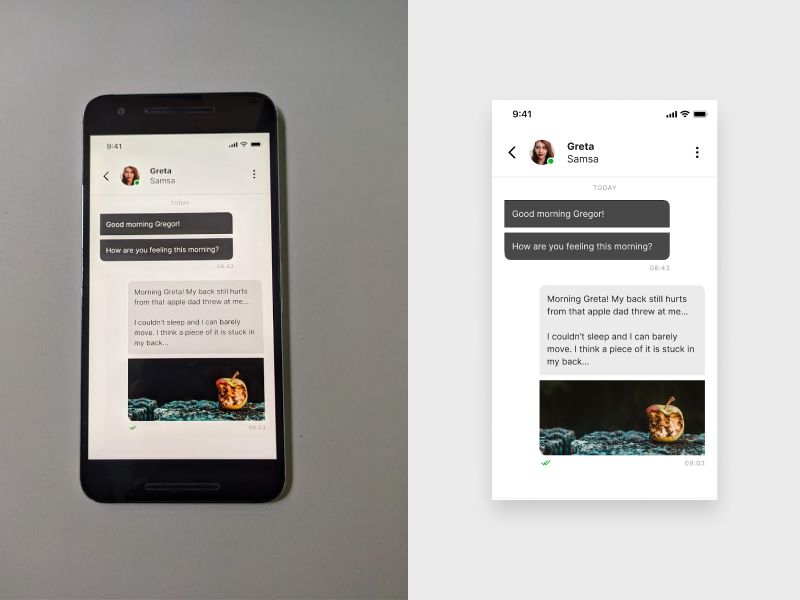
Notice how the frame automatically scales to the width of your device?
That could be an issue, as the content is not showing in the resolution of the device, it’s just scaled to fill the width. That means that the buttons are a bit bigger, the text is not 1:1 as in the design, and so on. To tackle this problem you’ll need to tweak your frame a bit and in the next few paragraphs, I intend on teaching you how.
What are "dp" and why must I learn about it?
Okay, before we learn how to get our Figma design to appear 1:1 on the actual device, we need to brush up on a few “new” things, but I’ll guess that’s the reason you’re reading this, so from now on, be prepared to expand your brain hole.
"Dp" or density-independent pixels are a virtual unit of measurement. One "dp" is a virtual pixel that’s roughly equal to one pixel on a medium density screen (160 dp) that’s considered to be the baseline density. So, if you intend on viewing your design on a device, you’ll need to calculate your device pixel density. Here’s how you do that:
dp = (width in pixels * 160) / screen density
Width in pixels = Just enter your phone name into Google, open the specs (best and most known source is gsmarena.com) and copy your device screen width and paste it into the formula above
Screen density = Also use Google and the same exact source to find the exact density and copy it into the formula.
This means that the width of your frame in Figma needs to be the same as the calculated dp.
So let’s say you own a Nexus 6P (or you just happen to have one on your desk). After a quick Google search, you'll find out that the screen width is 1440 px, and screen density is 518 ppi. After you insert the required data into the formula, you get something like this:
dp = (1440 * 160) / 518
dp = 444.79
So for our Figma frame width, we’re going to use 444 (rounded to a number divisible by 4). You can also calculate the height using the same formula if you want to preview the entire frame on the whole screen, but generally, we just need the right width to remove Figma’s auto-resize on device width as height is not the most important here.
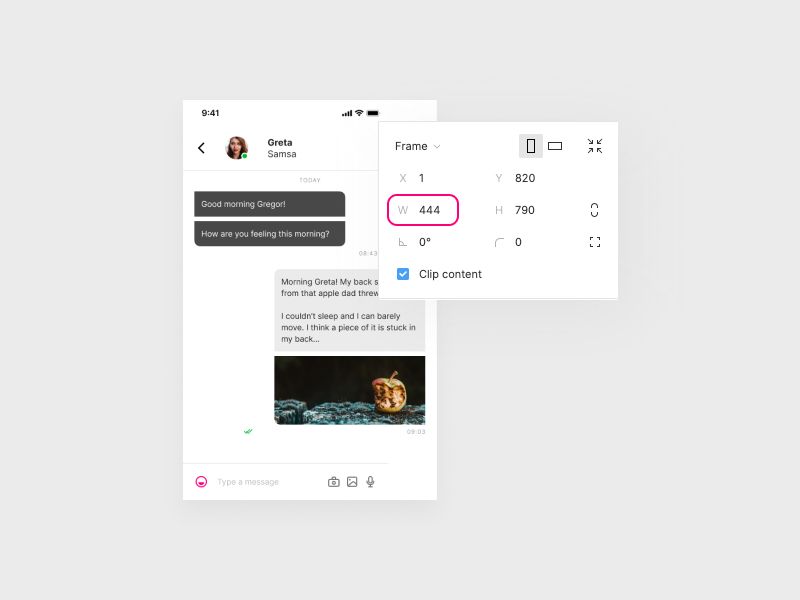
After you’ve adjusted the width to match your device, that’s it, you’ve got a correct preview on your device as in your Figma file.
From here, you can tweak the file to adjust the grid and get the components to fit right on the screen.

That's a wrap
Let's recap and also help out our TL;DR audience with a nice rundown:
- Download Figma Mirror to your device
- Decide on a frame you want to preview on a device
- Find out the "dp" of your device
- Set Figma frame to correct width for your device
- Voilà
World domination?
With this method you'll be able to translate your Figma designs onto the device in the correct ratio.
In conclusion, this is a great way to test your design for readability, contrast, and other industry requirements on a real device. For bonus points, you can go a step further and use this to prototype your design on an actual device and show your clients how your design will look on a device they’re holding in their hands.
Thank you for taking the time to read this post. Feel free to share your thoughts and drop us an email at hello@prototyp.digital. 😄