GitHub Actions is a powerful automation tool integrated into GitHub that allows developers to create custom workflows.
It uses the simple YAML syntax to define tasks that can be triggered by events such as pushes, pull requests, or schedule-based triggers.
Common use cases include:
- Continuous integration (CI)
- Continuous deployment (CD)
- Automated testing
- Managing dependencies
You can find all the information on GitHub Actions on their website.
But for now, let’s dive into this article and master the basics of GitHub Actions!
Where to find GitHub Actions?
You can find most of the GitHub actions on their official marketplace.
My rule of thumb is — before trying to integrate any action into your workflow, first check the marketplace if someone has potentially created this action.
It’s pretty common that someone has already had the same issue and decided to create and publish a GitHub Action for that issue.
And if one action doesn’t do the trick, you can always mix in more than one action to create your desired workflow.
Why did we have to create our own GitHub action?
We’re working on a project where we go through a ton of releases to our test environments (development and acceptance mostly). And it’s not the first time that we had more than one release to production in a single day.
The thing is — it started to become a bit difficult for us to track only the production releases only.
If our project managers asked us what was in the latest production release, we’d have to dig a bit to get our latest release notes.
The decision was made — we will track our production releases on the Google Calendar. This way, we’ll know when and what did we release.
”Of course, someone has already created the action for our case.”
- Dino, June 2024
No one did.
How did we create our own GitHub action?
Creating a GitHub Action is pretty straightforward, it’s well-documented and you can find the complete instructions on GitHub’s official website.
And since we’re working mostly with Typescript, this was my main weapon of choice.
The main idea was to connect the action with the Google Calendar API, so that when we call the action, we pass it some props — title and description. This would create our Google Calendar event with the passed props, completing my mission.
To connect the action with the Google Calendar API, you’ll need to do a quick setup first.
Here’s how to do it.
How to set up everything you need for this action to work?
Here’s the complete step-by-step guide on how to track your production releases on Google Calendar with GitHub Actions.
Setting up the GCP project.
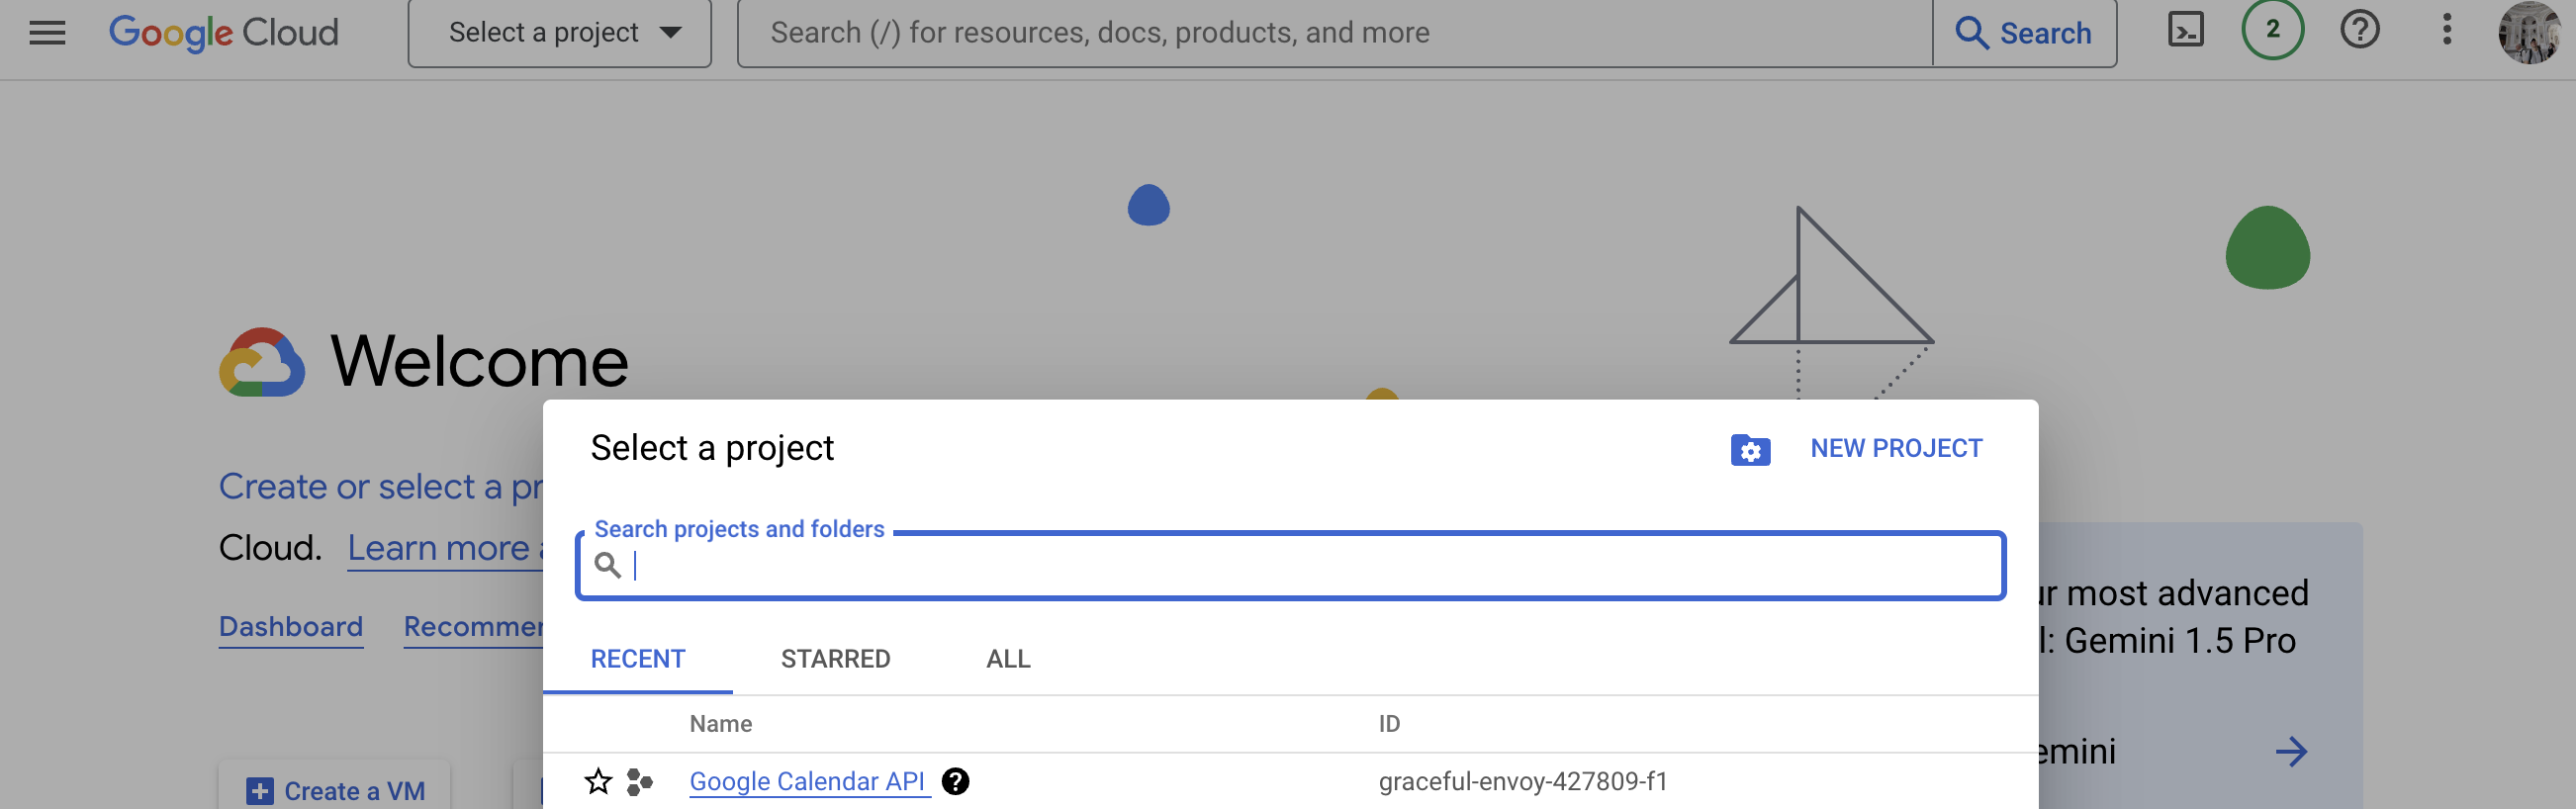
First, you’ll need to create your Google Console Project (or select an existing project).
For this article, we’ll select an existing project and continue working with that.
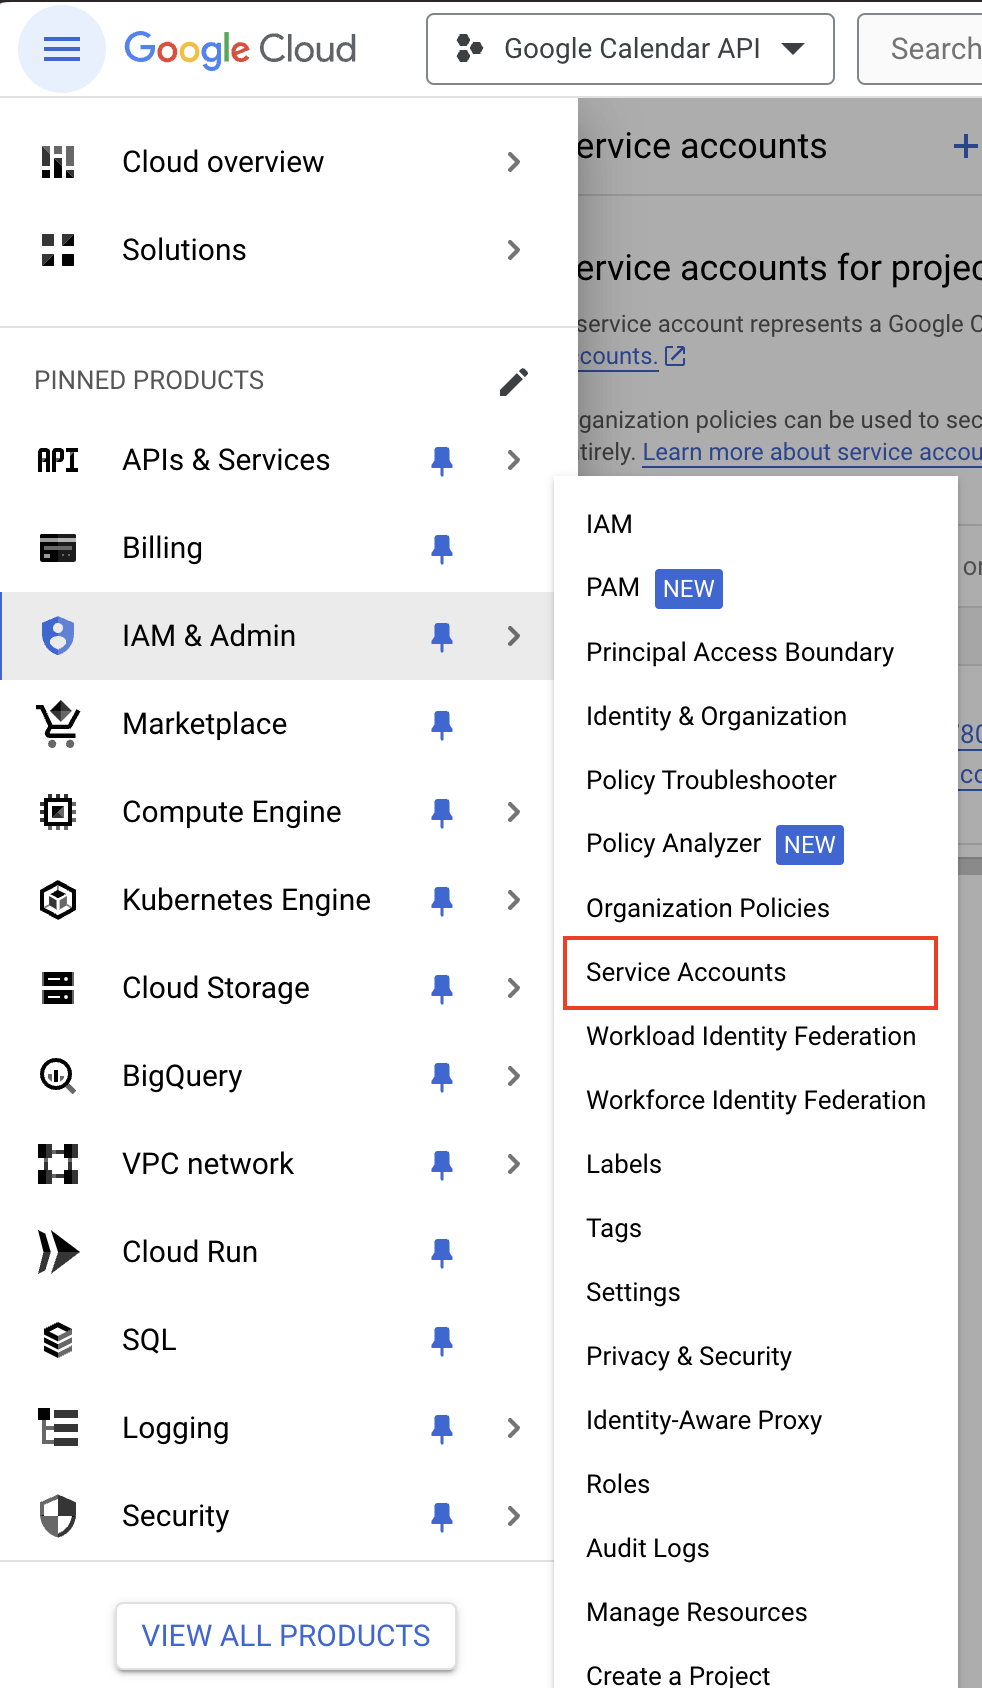
When you’ve created and selected your project, you’ll need to create the service account that will be used for calling the Google Calendar API.
To create a service account:
- Open the navigation menu
- Go to the IAM & Admin
- Select Service Accounts
You can see how it looks in the image below.
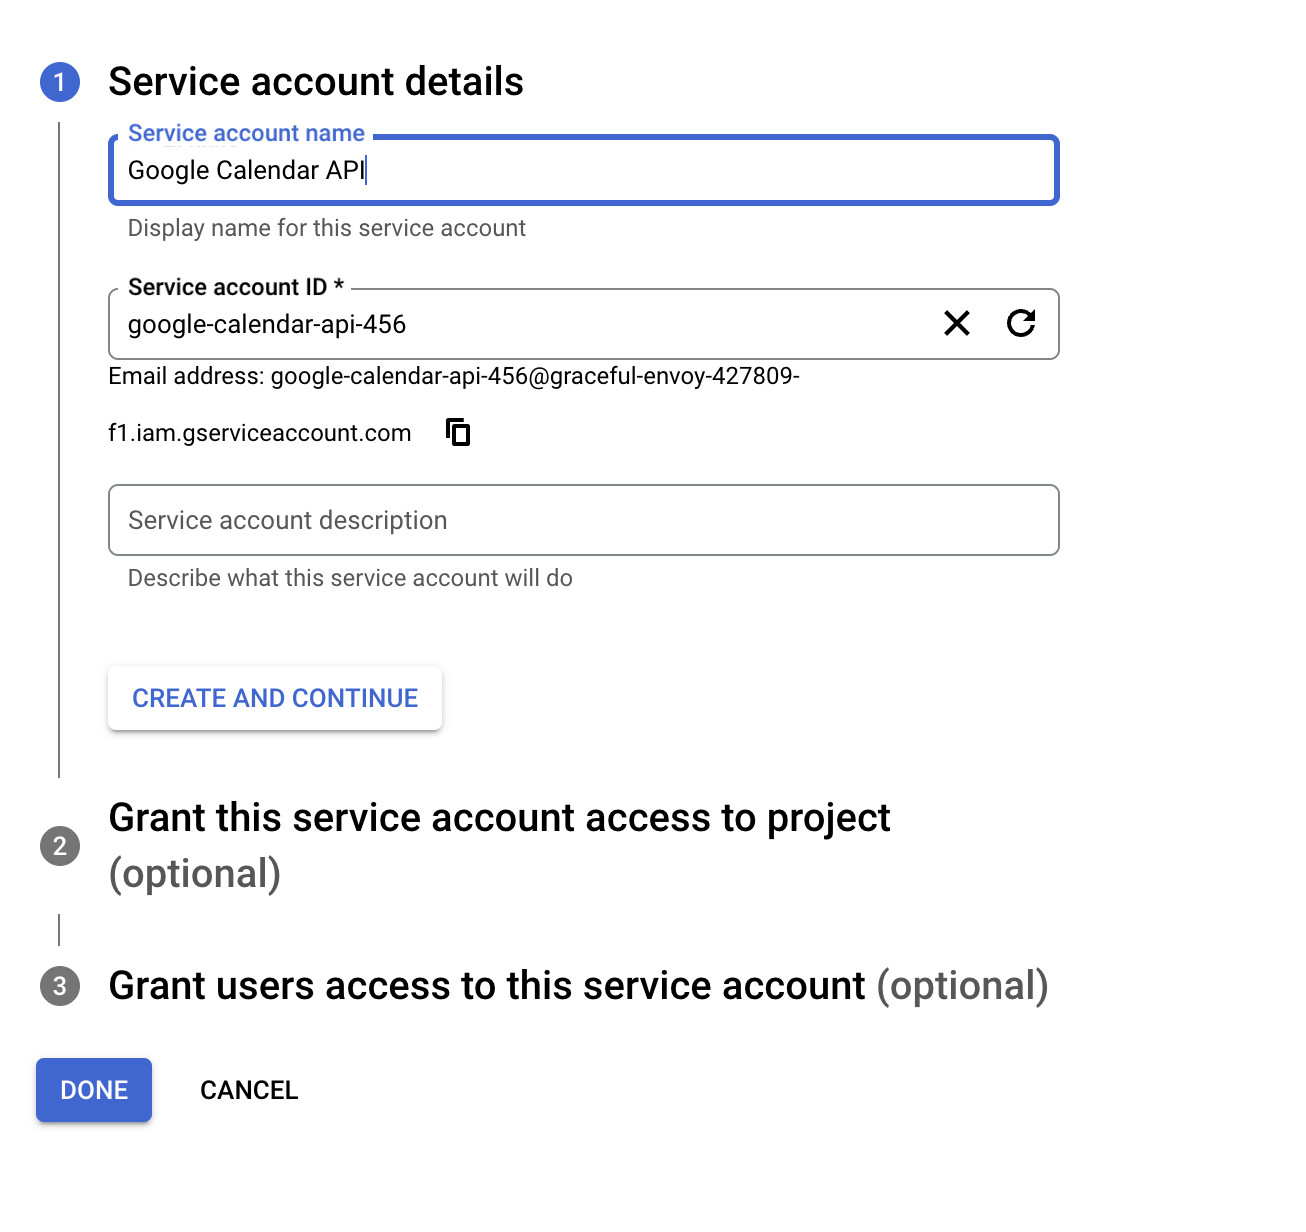
When you’re in the Service Accounts dashboard click on the + CREATE SERVICE ACCOUNT button at the top of the screen.

Next, fill in the data in the first step and click on DONE. For reassurance, please check the image below.
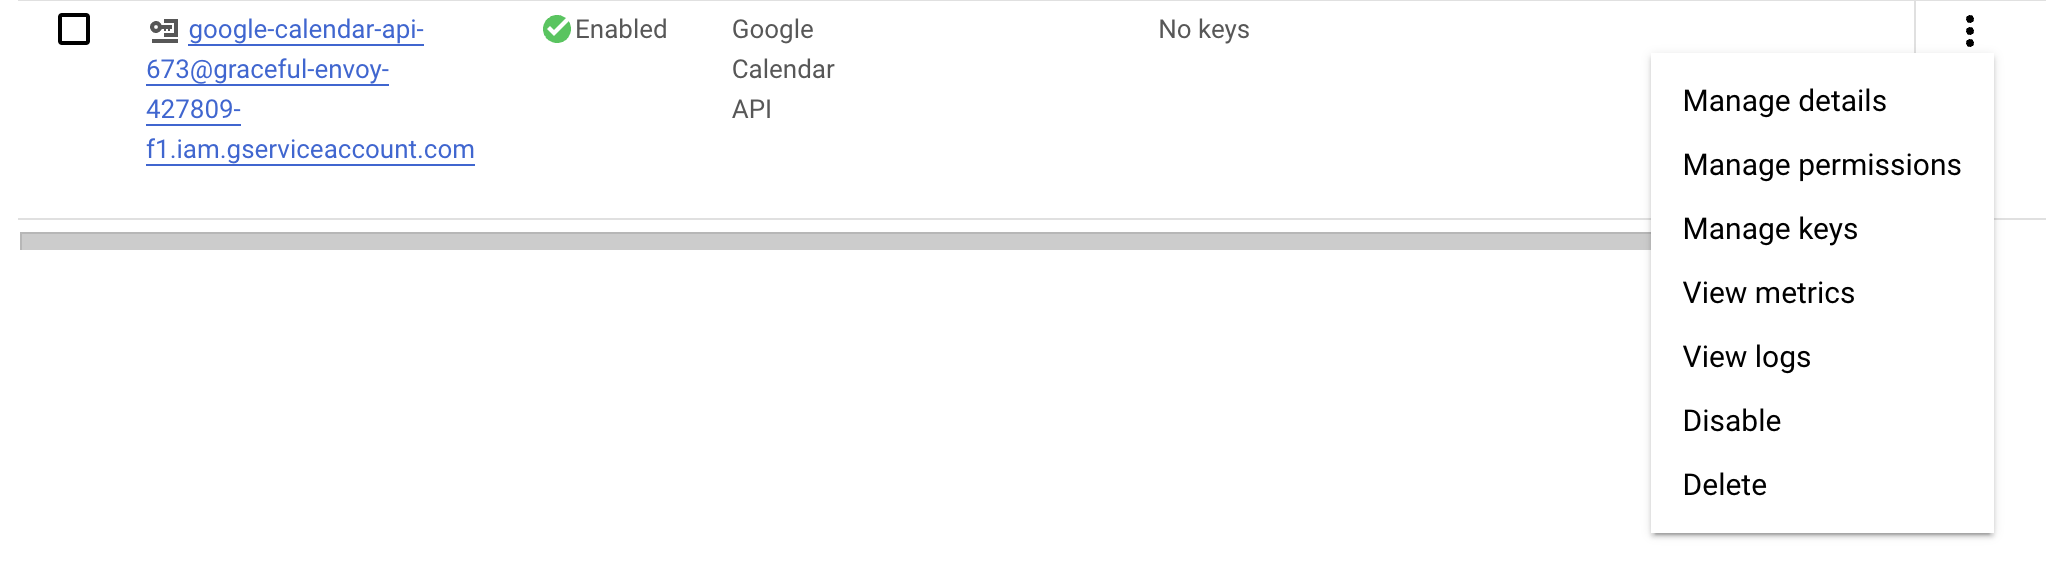
Now, when you’ve created the service account, you’ll need to get its access keys. But first, you must create the access keys.
To create them, click on the three dots in the upper right corner and select “Manage keys”.
Also, check the image below to see what this looks like.
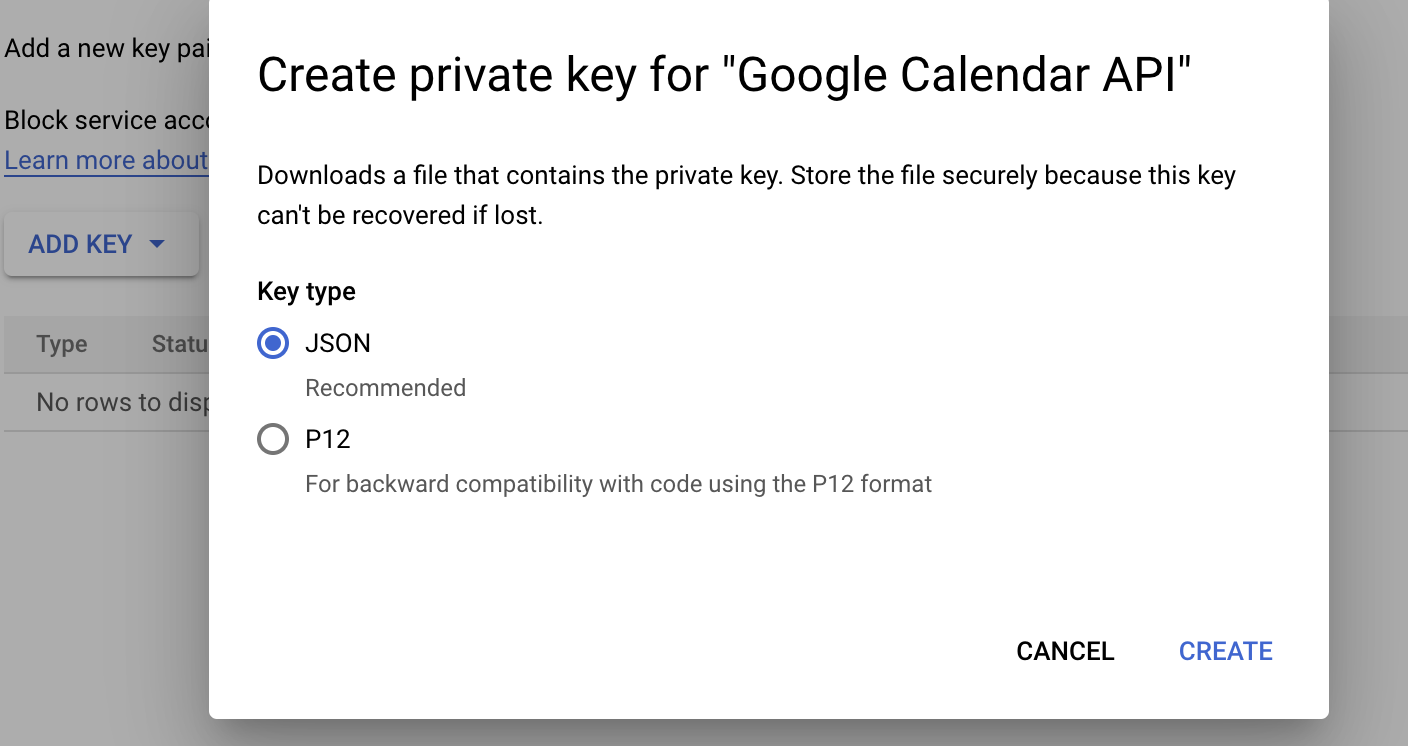
Next, click on the “Add Key” button and select “Create new key” from the dropdown.
When the modal pops out, select JSON and click “Create.”
After that, your browser will automatically download the JSON file with the credentials for that service account. Please check the image below for reassurance.
Now, when you’ve downloaded the JSON file containing the service account credentials — make sure you keep it open in the background. You’ll need it very soon.
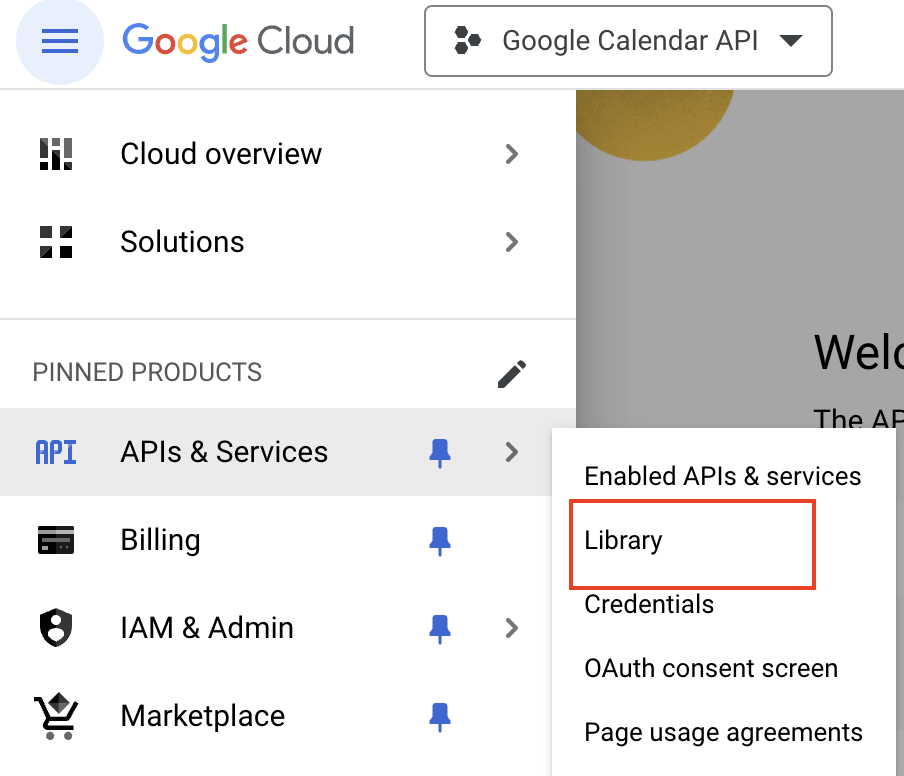
The next step is to enable the Google Calendar API. You’ll have to:
- Click on the menu
- Select APIs & Services
- Click on Library
Once again, please check the image below.
When in the Library, search for the “Google Calendar API” and select the first result that comes up. You’ll see something like this in the image below.
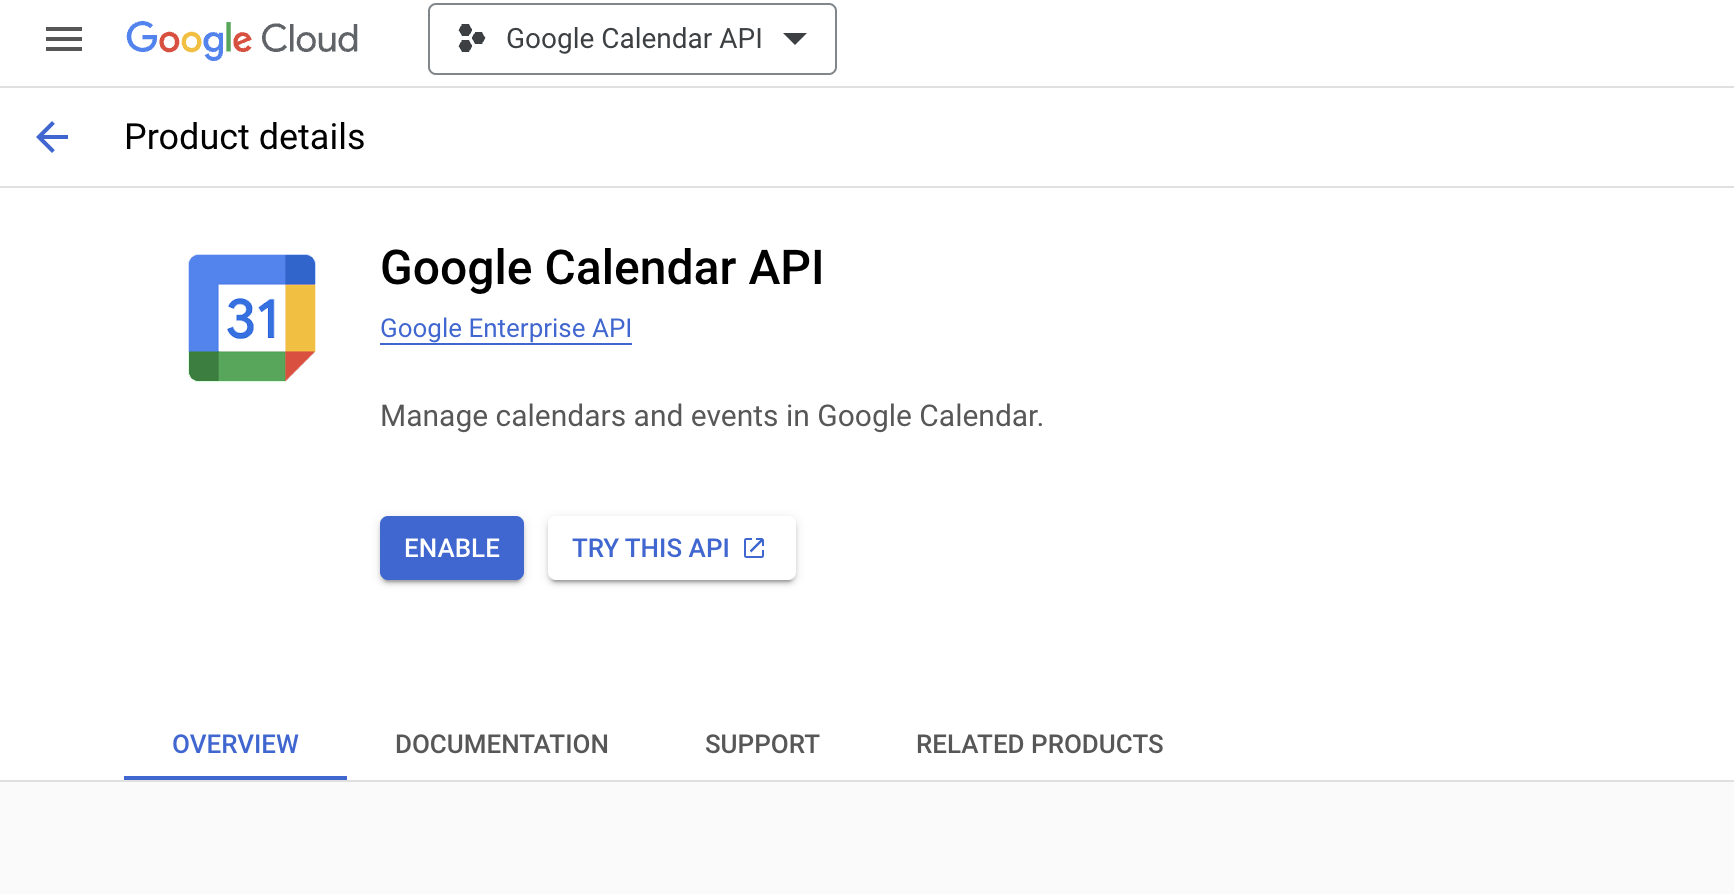
Finally — enable it by clicking the “Enable” button.
And that’s it for our Google Console Project setup! Let’s move on to the next step.
Setting up the Google Calendar.
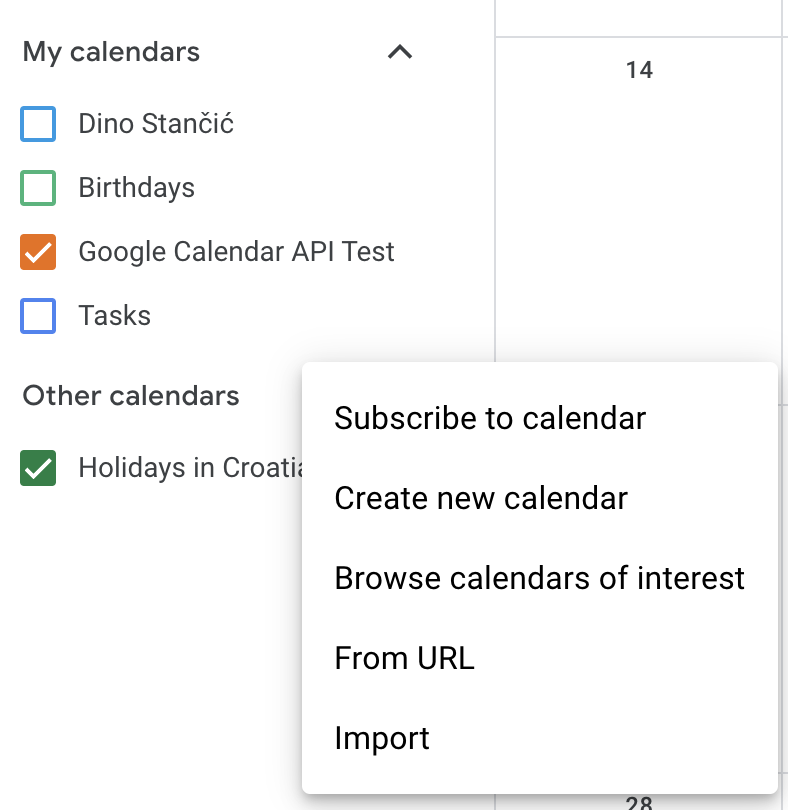
To set up the Google Calendar, open your calendar and create a new calendar. Simply click on the + button next to the “Other calendars” title.
Please see the image below.
Now, when you’ve created a new calendar, click on the three dots next to your calendar.
You’ll need to select “Settings and Sharing”.
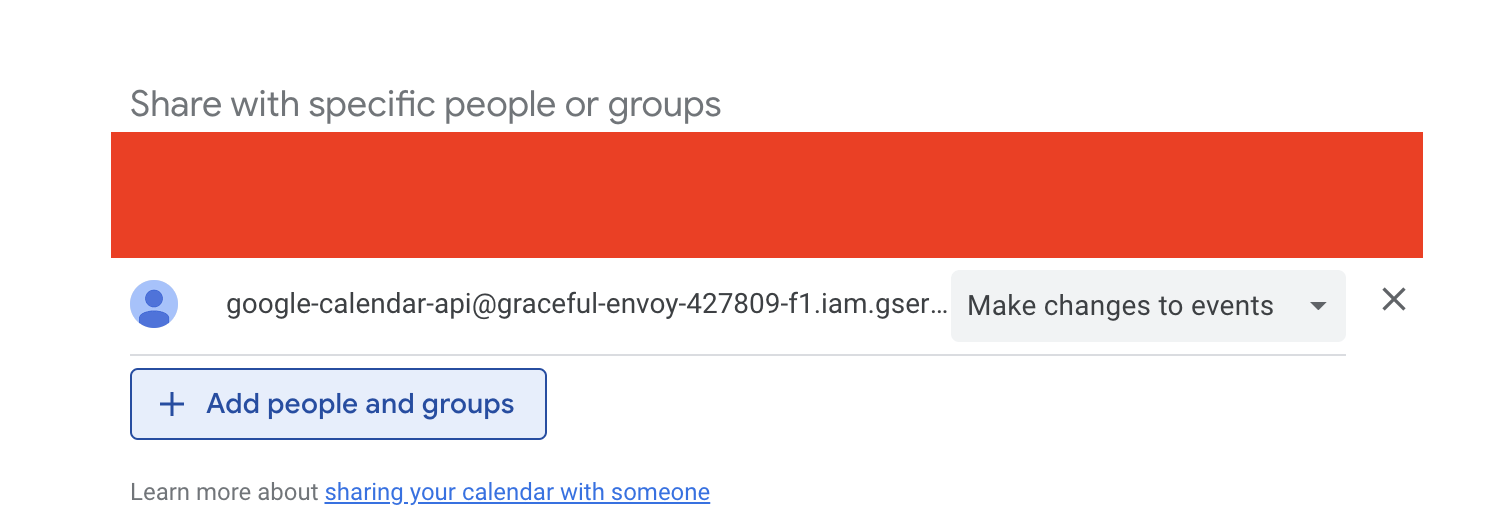
Next, scroll down until you find the “Share with specific people and groups” option.
Finally, click on the “+ Add people and groups” button and add the service account that you have previously created in the Google Console Project.
To find the service account email, check the downloaded JSON file. It should look something like this.
Remember when we told you to keep that JSON file open in the background? Well, now’s the time to check it.
Open the JSON file and look for the service account email.
It should look something like this code block below.
{
  "type": "xxxxxxxxxxxxxxxxx",
  "project_id": "xxxxxxxxxxxxxxxxx",
  "private_key_id": "xxxxxxxxxxxxxxxxx",
  "private_key": "xxxxxxxxxxxxxxxxx",
  "client_email": "xxxxxxxxxxxxxxxxx",
  "client_id": "xxxxxxxxxxxxxxxxx",
  "auth_uri": "xxxxxxxxxxxxxxxxx",
  "token_uri": "xxxxxxxxxxxxxxxxx",
  "auth_provider_x509_cert_url": "xxxxxxxxxxxxxxxxx",
  "client_x509_cert_url": "xxxxxxxxxxxxxxxxx",
  "universe_domain": "xxxxxxxxxxxxxxxxx"
}
For now, we’ll need just the “client_email” property.
Copy and paste it into the email input field. You’ll need to give it a “Make changes to events” permission.
Once you’ve done that, the Google Calendar part is finished. But don’t close the calendar settings yet because we need to do one more thing.
Scroll down to the “Integrate calendar” and keep the tab open.

The properties that you need for this action are:
- client_email → from the downloaded service account JSON file
- private_key → from the downloaded service account JSON file (just copy and paste it into the repository secrets in the format as it is in the JSON file)
- Calendar ID → from the Google Calendar settings
How to integrate all of that with our GitHub action?
You’ve reached the final part of this tutorial. Kudos!
Now, here’s the documentation for this GitHub Action. Please check it before moving forward.
In this part, I’ll show you the most basic integration of this action.
Before we continue, a quick piece of advice. Do not use the service account credentials and Calendar ID (the one I asked you to keep open above) directly in your workflow.
Instead, add that data as Repository Secrets for your project and use them that way.
If you’re not familiar with this method, please check the documentation for using secrets in GitHub Actions.
Create a Calendar event on release
Here’s how to create a Calendar event on release — the most basic integration of this GitHub Action.
Check the code below.
name: Test Action On Release

on:
  release:
    types: [published]

jobs:
  google-calendar-event:
    name: Google Calendar Event
    runs-on: ubuntu-latest

    steps:
      - name: Checkout
        id: checkout
        uses: actions/checkout@v4

      - name: Add Google Calendar Event
        uses: stancic/create-google-calendar-event@v1.2.1
        id: create-event
        with:
          service_account_client_email:
            ${{ secrets.SERVICE_ACCOUNT_CLIENT_EMAIL }}
          service_account_client_private_key:
            ${{ secrets.SERVICE_ACCOUNT_CLIENT_PRIVATE_KEY }}
          calendar_id: ${{ secrets.GOOGLE_CALENDAR_ID }}
          summary: ${{ github.event.release.name }}
          description: ${{ github.event.release.body }}

      - name: Print Output
        id: output
        run: |
          echo "${{ steps.create-event.outputs.event_link }}"
For this action, we’ve used our repository secrets for our credentials setup and our release name (title) and release body for our event summary (title) and description.
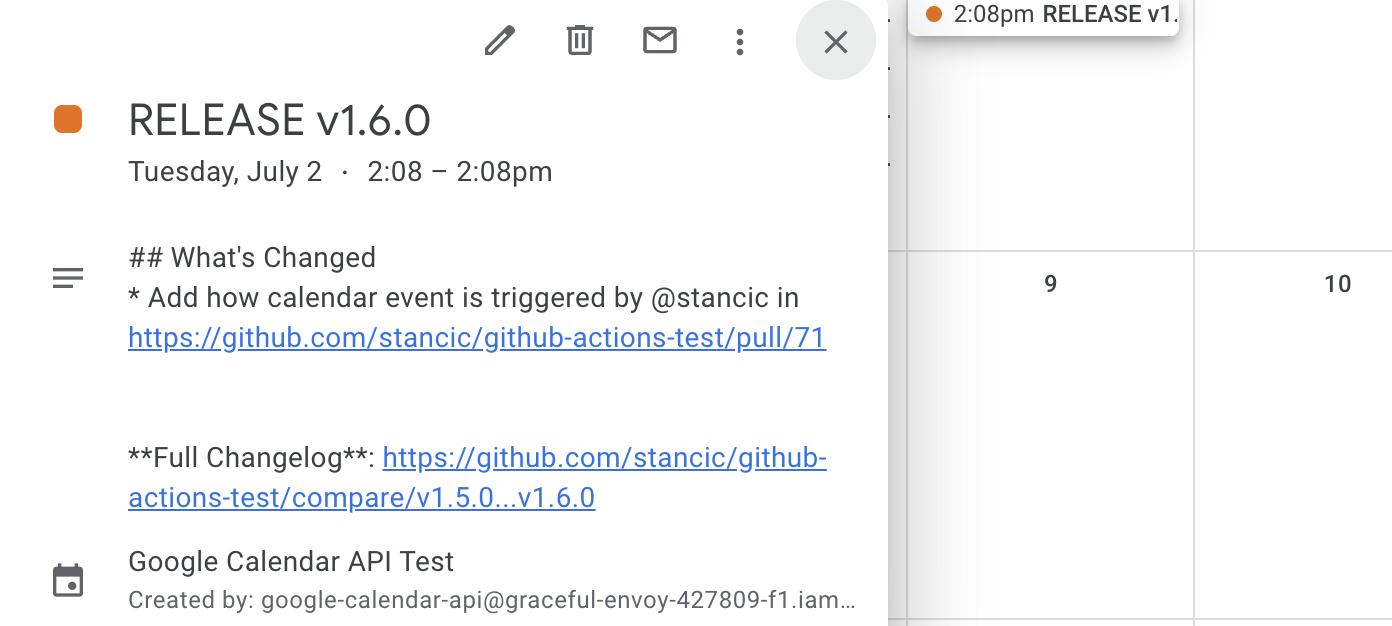
If everything is set up correctly, a release event should be visible in your Google Calendar once the release is published.
You should see something like the image below.
Which GitHub Action is next?
GitHub Actions can do much more than just CI/CD. They are your automation sidekicks for all kinds of tasks.
By integrating it with the Google Calendar API, you’ve made tracking production releases a breeze. And it was all done so quickly.
We’d love to hear from you!
Have you tried creating custom GitHub Actions? What challenges did you face? Write to us at hello@prototyp.digital and share your latest development story.
And lastly — thank you for reading! If you found this post helpful, please share it with your network. Let’s keep this conversation going and help each other make our lives just a little bit easier.